Got Driftwood?

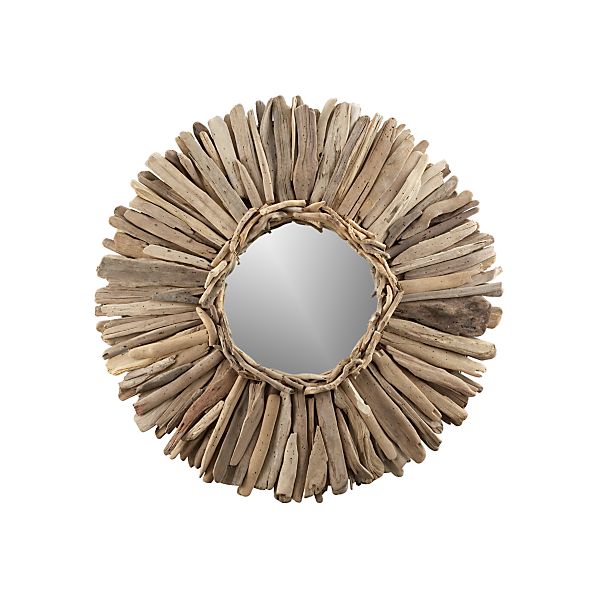
The above Driftwood Mirror from Crate and Barrel. is very lovely. (Sorry, they no longer carry this item, but don't worry...keep reading.)
It's catalog description reads:
"Rings of rustic beauty, straight from the beach. Hand-harvested driftwood, only available a few months a year, is meticulously assembled by skilled craftsmen into each unique frame.
Made in the Philippines."
Cost: $199.00 + $26.95 shipping = $225.95
Hmmm...
This is our backyard at Camano Island.
Are you thinking what I'm thinking?
Yep!
Make Your Own
Crate and Barrel Driftwood Mirror
for about $15.
(The Puget Sound Version)
Here it is!
_____________________________
Supplies I used:
-Round mirror with a round, wood frame
-Gray or brown colored paint, paint brush
-Lots and lots of driftwood!
(on many WA state beaches, driftwood is plentiful!)
-High-Temp Glue gun and lots of glue sticks
-Heavy hanging wire
-Hair dryer (optional)
________________________________
Let's get started!
First, find a round mirror that already has a flat, frame.
It is somewhat difficult to find a round framed mirror,
especially when you're looking for one!
I finally picked up this beauty
at Goodwill for $8. Perfect!
Next, paint your mirror frame.
My son saw me painting and asked if he could do it.
(I never turn down help!)
We used some leftover khaki-colored paint we had
from painting a bathroom last year.
Now it's time to hunt down some driftwood!
Grab the kids and hit the beach!
You'll need lots of driftwood pieces!!
Try to find pieces that are flat on one side (they'll glue down easier!)
Look for lighter in weight pieces, don't go for the heavy ones!
Take more than you think you'll need---trust me!
Don't forget to pick up lots of small little driftwood sticks, too.
Give all the wood a bath with the hose. (Great job for the kids to do!)
Wash off all the sand and little bugs and set the wood out to air dry.
If it's a sunny day, the drying won't take long...
if you live outside of Seattle you may be waiting awhile!
Now the fun part!
Lay out all your pieces on top of the mirror frame.
As you start working with the wood and laying the pieces out,
you'll find that many pieces just don't fit. Too round, too bulky, too big, etc.
You might even need to go out and gather more wood, mid-project! I did!
Try using some smaller pieces on top of the bigger pieces.
At this point during the project, I must mention that here in the
Pacific Northwest, our driftwood does not all come in the same lengths.
(Apparently driftwood in the Philippines is different?)
Some pieces will stick out further than others.
It didn't bother me...hopefully it won't bother you.
I sort of like that 'sunburst' style...plus I wasn't going to sand down my wood pieces!
When you think you have a nice looking layout, start gluing.
I applied hot glue directly to the frame and some glue to the wood as well.
Use lots of glue (even more than I used in the above picture!)
I had my daughter help me with the gluing,
(someone had to take pictures, right?)
Be sure to press and hold the wood on the glue for a bit,
before moving onto the next piece.
Once the big pieces are all glued down, it's time for the tiny pieces.
Work the tiny driftwood sticks into the edges of the mirror and glue down.
Also, look for spots that the big pieces didn't cover.
Wedge smaller sticks in to cover the open areas.
Be sure you cannot see the painted frame peeking out.
I ended up gluing some of the smaller sticks directly to the mirror.
A hair dyer is helpful getting all the loose hot glue fibers off!
This tip works great with any glue gun project!
Now stand back and take in the natural beauty of your mirror!
If your mirror didn't come with hanging hardware, attach heavy duty wire!
This mirror is heavy!
The hardest step may be finding where to hang it?!
Quite the conversation piece, wouldn't you say?
Look what else I found on Crate and Barrel's website?

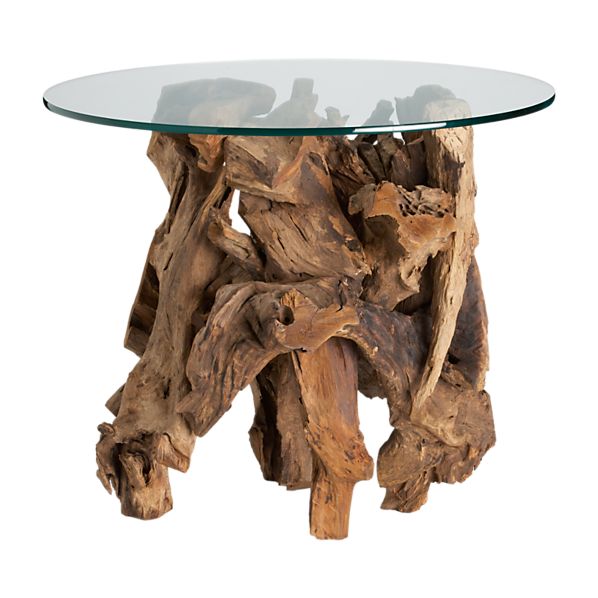
A Driftwood End Table! Only $399. Hmmm??


That is awesome! I love that you really let the kiddos be involved in making it too!
ReplyDeleteYour blog is awesome and I love that mirror! :) I'm here from the Sassy Sites linky party... I'm a new follower, and I would love for you to check out my blog too! :)
ReplyDeleteAmy
redheadedcrafter.blogspot.com
I love how this turned out! Now to find some driftwood in VA
ReplyDeleteWhat a great idea! I can't wait to make one!
ReplyDeleteLOVE this! I would like to post a link with a picture on my blog back to your post under our recipe/craft section. I will also place your blog button below it!
ReplyDeleteLet me know!
:) Steph
steph@debtfreespending.com
www.facebook.com/debtfreespending
www.debtfreespending.com
This is amazing. What an incredible find in your own backyard.
ReplyDeleteAwesome project! I would love to get my hands on driftwood like that...so jealous! I just shared this project on my facebook page ~ www.facebook.com/sasinteriors! I'm a new follower too!!
ReplyDelete~Jenna, SAS Interiors
Gorgeous!!! So wish I had some driftwood laying around... probably won't find much of it in KS though :(
ReplyDeleteThat looks great! I love that your little buddy got involved.
ReplyDeleteWhat a great idea!
ReplyDeleteThis is so cute!
ReplyDeleteFabulous! DIY is always better.
ReplyDeleteJust beautiful!! Love that your kids were part of the process and that you were somewhere beachy...oh I wish! ;)
ReplyDeleteI am a new fan {follower}! Happy Sunday!
Michelle
ourwonderfilledlife.com
Wonderful - West Elm has some drift wood pieces right now that I bet you could make - love it
ReplyDeleteOH MY GOSH!! I LOVE it!!! I need to head out to Galveston and grab me some driftwood!! :)
ReplyDeleteLooks great! Don't you just love when you can make something for so much less than it would cost? I love it. Love that you have the kids help out, too!
ReplyDeleteThis is BEYOND fantastic! You did such a great job taking that idea and making it your own and we are so glad you shared it with us at Inspiration Friday this week!
ReplyDeleteVanessa
Such a great idea! I would love to feature this on Reduce, Reuse, Upcycle. Feel free to stop by and grab a featured button. Thanks so much!
ReplyDeletehttp://reuseandupcycle.blogspot.com
Michelle, thanks so much for leavin a comment. This mirror is awesome!! I so wish there was driftwood here in RI, but nope. You're so lucky!! I'm going to checkout your other beachy posts...
ReplyDeleteVery cool! I've been collecting drift wood for a while-I think I'm going to try this!
ReplyDeleteGorgeous! It makes me want to move somewhere with driftwood (oh wait, I already wanted to do that!). ;)
ReplyDeleteOkay, I think this project is AWESOME! I may have to come visit you so that I can collect some driftwood to make my own.... (Just kidding. I'm not a weird stalker. LOL)
ReplyDeleteNow I want to make a driftwood mirror. I love bringing natural elements into the home. Turned out lovely.
ReplyDeletethis is awesome!! as a creative person (which gets me into LOTS of trouble with projects,) I am looking to do a very similar project for an ENTIRE REMODEL of our sons' bathroom - yes, another project that is getting me into trouble... so far we have three (yes THREE) different types of tile special ordered for the flooring and baseboards, a custom cabinet in the works and trying to find the right slate slab to have cut for the countertop - along with a hand hammered nickel sink... see what I mean about trouble?
ReplyDeletesoooo, anyhow... we were talking about the 6 antique mirrors (of my husband's grandmother and how we might be able to use them in a room that is going to look like the great outdoors (in a classy way,) and got on the internet...
imagine what ROUND WOODEN FRAME gets hits on... luckily, yours was one of the first and has provided a multitude of creative ideas bouncing around in my head (danger, danger, Will Robinson!)
We live in Texas, ya'll, so driftwood is pretty much just pretty pictures we see on the internet... BUT, we do have a huge willow tree in the backyard that continually loses branches...
as soon as the craft stores open I am jetting out the door for a metric ton of glue sticks!! gotta find a frame first, but think I might look to see what sizes embroidery hoops come in... hmmm...
THANKS, MICHELLE!!
amei, muito criativo
ReplyDeleteSo cool!
ReplyDelete