
When a bride calls for a rustic wedding reception in the basement of a church, what do you do?
Panic? Worry? Go without sleep for a month?
Well... you gather burlap and lace and old windows and lights and mason jars and...
get creative of course!

Panic? Worry? Go without sleep for a month?
Well... you gather burlap and lace and old windows and lights and mason jars and...
get creative of course!

I've already shared a few of the wedding reception creations,
but I'm finally ready to share all the pictures I captured.
but I'm finally ready to share all the pictures I captured.
Before:
A big church basement.

During:
This is what my house looked like as I planned for the wedding!
My family called it the wedding bomb. It truly looked like a wedding had exploded in our home.

After
A sweet and beautiful, rustic wedding reception.

There were so many little details that went into this reception.

Check out just a few...

A little overwhelming, isn't it?
Let's back up a bit.
You'll remember from this post, that I made over 50 burlap wrapped jars.

Some of these jars were filled with flowers, others with candles.

The flowers were a combination of store bought pink carnations
and flowers collected from my friend's garden.
The bride was proposed to on the beach, so special shells were set out
as well as framed engagement photos of the couple.
You'll remember from this post, that I made vintage sheet music wreaths and fans.

The big fans were hung around the room.
The tiny fans were glued onto wood skewers and placed in the flower arrangements.
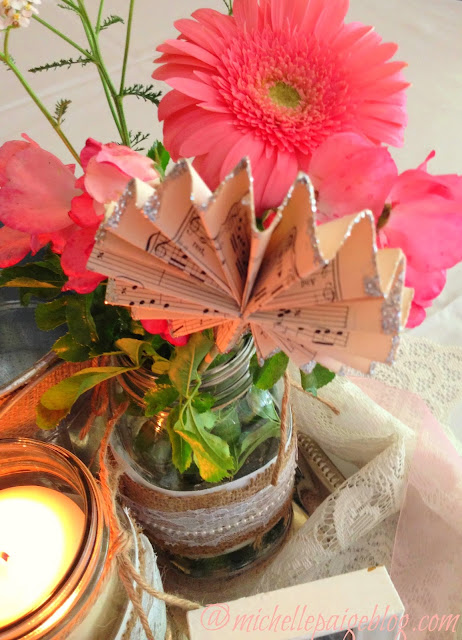

The chicken wire frames looked quite rustic next to my old window.
Remember the window from this post?
This is what my house looked like as I planned for the wedding!
My family called it the wedding bomb. It truly looked like a wedding had exploded in our home.

After
A sweet and beautiful, rustic wedding reception.

There were so many little details that went into this reception.

Check out just a few...

Let's back up a bit.
You'll remember from this post, that I made over 50 burlap wrapped jars.

Some of these jars were filled with flowers, others with candles.

The flowers were a combination of store bought pink carnations
and flowers collected from my friend's garden.
The bride was proposed to on the beach, so special shells were set out
as well as framed engagement photos of the couple.
You'll remember from this post, that I made vintage sheet music wreaths and fans.

The big fans were hung around the room.
The tiny fans were glued onto wood skewers and placed in the flower arrangements.

The wedding happened to fall on the hottest day of the year, so we needed lots of drink stations.

The chicken wire frames looked quite rustic next to my old window.
Remember the window from this post?
No nail or tack holes were allowed on the church's walls, so I used Command hooks to hang everything.
The wreath was a labor of love, complete with vintage music titled
Thy Wedding Morning.
The wreath was a labor of love, complete with vintage music titled
Thy Wedding Morning.

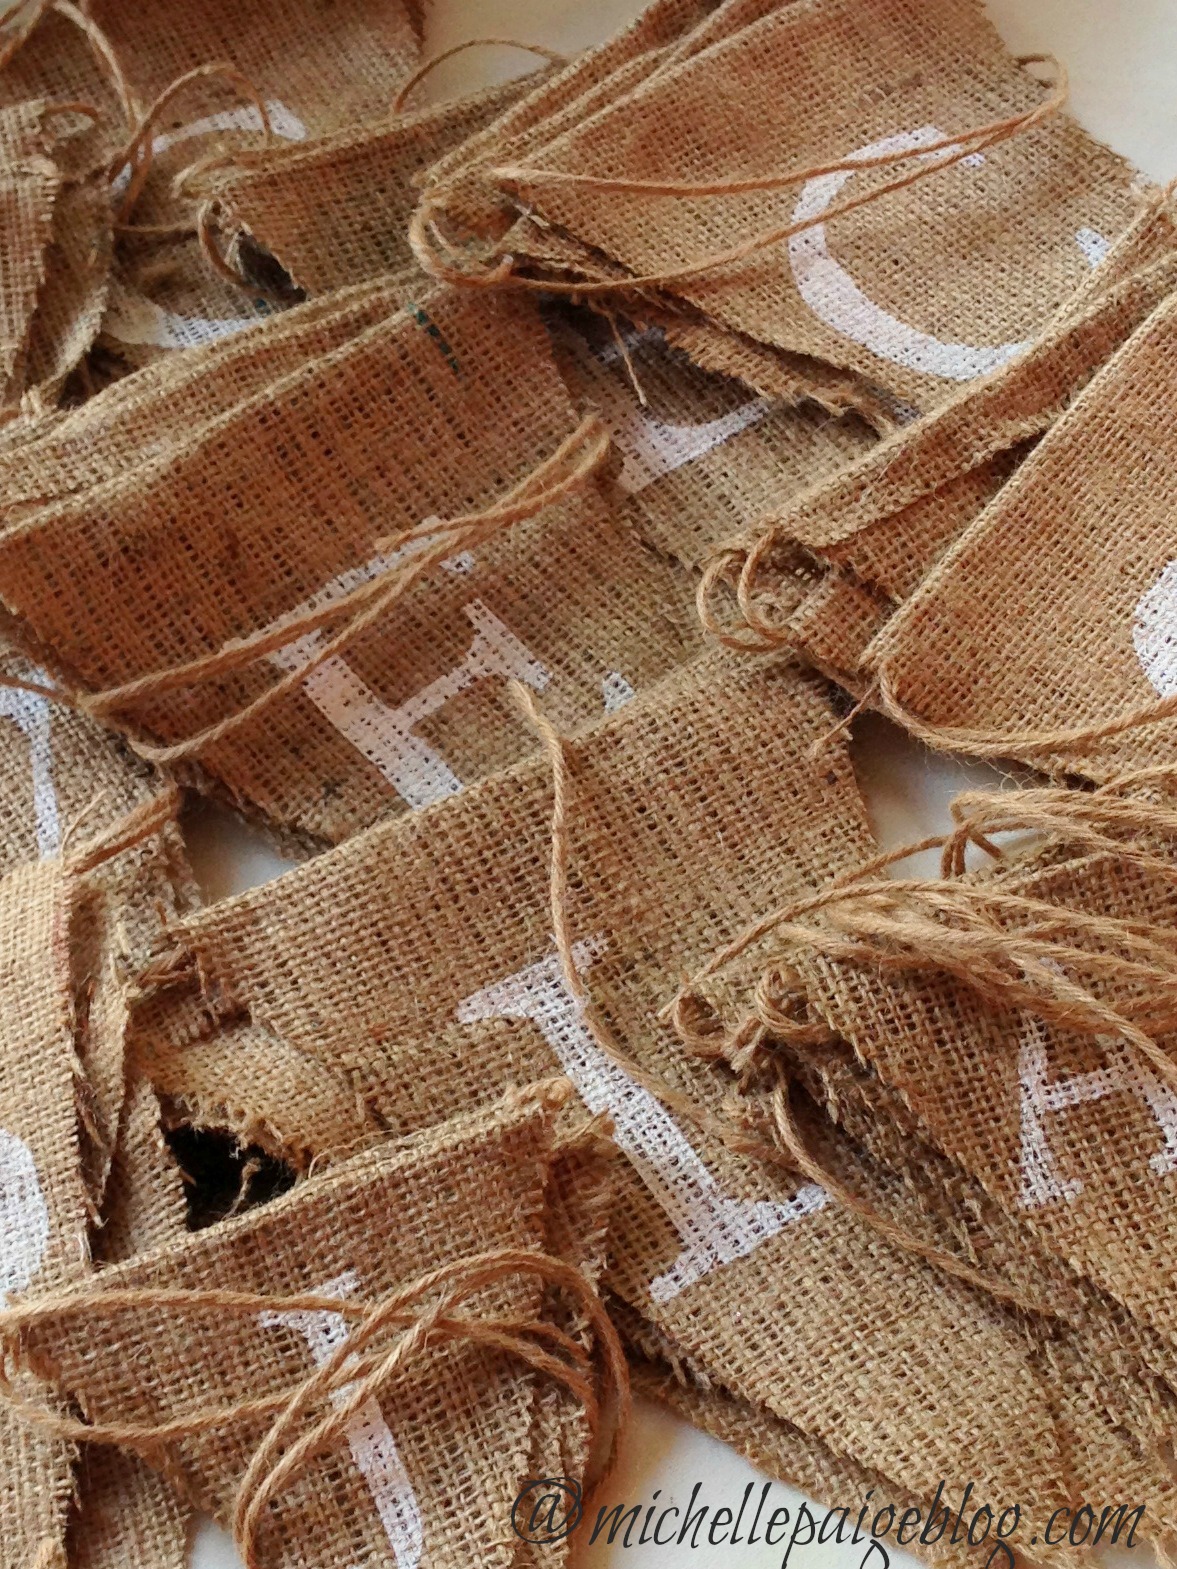
You'll remember from this post that I made a bunch of burlap banners.
The banners were hung everywhere, adding the rustic look to the basement.
The vintage suitcase was perfect for collecting the cards...from this post.
A banner was hung on the table for the gifts.


Here's another drink station using an old wooden gate as a backdrop and another burlap DRINKS banner.


White lights, burlap ribbon, pink ribbon and white tulle helped pull it all together.
Notice I gave the water dispenser a little burlap treatment as well?
The food was placed in the center of the room.

The caterer is a super talented church friend.
I learned so much just by watching her work.

She made levels with wood boxes and covered them with tablecloths.
I decorated around her amazing food!

I'm sure you noticed the incredible veggie tower?
It was quite the centerpiece!

I printed out the little chalkboard signs for the dips.

On the far wall was a fun area to write notes and make cards.
The bride is an elementary school teacher and beloved babysitter.
So naturally, there were lots of kids there.

The old windows were from the caterer.
They came from a Seattle school that was being torn down in the 80's.
I pulled the windows out of her shed and told her that she better hang them up in her house,
or I'm not returning them! They were so beautiful!

White lights and tulle helped illuminate the kids' area.

Blank cards with colored pencils and crayons were set out.
I printed out a word bank to help the kids make a wedding card.
(Their teacher's new name is a hard one to spell and say!)
An old screen was used to display the kid-made cards.


Burlap wrapped baby food jars held the crayons.

(Think 'kids table' for adults.)

A large glass vessel was placed on the table with instructions for the guests to write the new couple notes of encouragement and wisdom for their 1st anniversary.
The notes were to be written, rolled up, then tied with twine and placed in the vessel.
The couple plans to display the vessel in their home, but not read the notes until their anniversary.
On the other end of the room was the cake area!
Remember the old door from this post?
I added a ladder on top with burlap, tulle, lights and ribbon.

The bride's florist decorated the cake with fresh flowers.

It was gorgeous!

You probably remember the glass vase banner from this post,
I fancied it up with more tulle, a mini-burlap banner and lights.
Next to the cake area was a photo booth.

I captured a few guests as they made a stop at the photo booth.
I set out white rustic frames and a love banner for props.
The couple had an instagram hashtag for the guests to upload their photos to.


Whew!
There were so many more details I didn't even get pictures of!
-Lots more banners and lights were everywhere.
-8 burlap wrapped posts with lights, ribbon and tulle.
-A punch station set up with 6 punch bowls!
-A special quilt that was made for the bride was hung on a wall.
-Outside was more banners with a covered tent area.
-and on and on and on.

Later I received a message from the bride that the reception was everything and more she had hoped for.
Wishing Alyssa and Matt a wonderful marriage!
Congratulations!

Linked up to: Tatertots&Jello, ShareYourCreativity, SerenityNow, CraftOManiac, SundayShowcase, TuesdayTimetoSparkle, LilLuna, GingerSnapCrafts, LifeInspired, WowMeWednesday, HouseOfHepworths,


