twitter facebook instagram bloglovin google plus pinterest youtube

Friday

The Olympics are finally here!

Celebrate the fun with an
Olympics Family Dinner!

Easy and Quick Olympics Dinner idea with grape catching @michellepaigeblogs.com

Grab the kids to help and you can whip this up in no time!

Olympics Flag Pizza Dinner @michellepaigeblogs.com

First up:  Flag Pizzas!
Use the Pillsbury pizza dough and pre-bake it for 8 minutes on a cookie sheet.
After it cools, cut the crust into rectangles.  (These are the 'flags'.)
Pull out all your pizza toppings and challenge the kids
to make their pizza look like a world flag.

Japan's flag is a good one to start with...
Olympics Flag Pizza Dinner @michellepaigeblogs.com
Pizza sauce, mozzarella cheese and 1 piece of pepperoni.


Some are a bit more challenging than others.
Olympics Flag Pizza Dinner @michellepaigeblogs.com
The red, yellow, red striped flag is our interpretation of Spain's flag.


Cheese slices made nice stripes and we even cut some stars out for China's flag.
Olympics Flag Pizza Dinner @michellepaigeblogs.com
Do you recognize this flag?  It's Jamaica!
Have any idea what the black is?
They're blue corn chips!

I'm guessing you've never had tortilla chips on your pizza before... 
they're a little crunchy, but not bad.
We could have used olives, but no one in the house likes them.


Here's the Grand Ole' Flag...
Olympics Flag Pizza Dinner @michellepaigeblogs.com
Pizza sauce, mozzarella cheese, pepperoni strips cut and a blue corn chip for the 'blue'.

Olympics Flag Pizza Dinner @michellepaigeblogs.com
Once the flag pizzas are assembled, bake pizzas at 400 degrees for 6 minutes.


Meanwhile, set the table with world maps, and USA decor.
Olympics Flag Pizza Dinner @michellepaigeblogs.com
I ate Italy and Britain with a salad for dinner.


Don't be surprised when your dinner conversation ends up
sounding like a geography lesson.  After dinner,
surprise the family with a little food fun challenge.

Family Dinner Olympics:  Grape Catching!
(Yep, we're breaking the 'good manners-don't play with your food' rules tonight.)

Olympics Family Dinner Idea- Quick and Simple @michellepaigeblogs.com

The person across the table tries to throw a grape into their partner's mouth.
Each grape in = 1 point.
Add up the points per team.  10 grapes per person.

Olympics Family Dinner Idea- Quick and Simple @michellepaigeblogs.com

{Imagine the shock on my son's face when I told him I would be throwing grapes into his mouth!}

Winning teams are awarded medals--of course!
Candy Medal Ceremony
(It was no surprise that everyone wanted all three medals.)
Olympics Family Dinner Idea- Quick and Simple @michellepaigeblogs.com

Candy, scotch tape and ribbon make these medals super fast to put together! Just tape the candy to a piece of ribbon and tie around the back of the winner's neck. You can even have an award ceremony, humming the 'Star-Spangled Banner'. (For the gold medal, I taped two coins together with the ribbon in-between.)

Olympics Family Dinner Idea- Quick and Simple @michellepaigeblogs.com

To say my kid was excited to get his medals would be an understatement.


And finally...a very special dessert!
Olympics Torch Dessert Cone @michellepaigeblogs.com

Olympic Torch Sherbet Cone!

Olympics Torch Dessert Cone @michellepaigeblogs.com


End the evening off with some Olympics watching 
and rooting and hollering! Go USA!

Olympics Family Dinner Idea- Quick and Simple @michellepaigeblogs.com


 Enjoy the games!
Olympics Family Dinner Idea- Quick and Simple @michellepaigeblogs.com


 photo arrow.png CONTINUE READING

Thursday

Are you kids as excited as mine for the Olympics? 
Are they reading the paper trying to figure out when their favorite sport will be on TV? 
Are they asking and asking if today is when the Olympics will start? 
Yes?  Well, here's a perfect treat for your Olympic fans. 

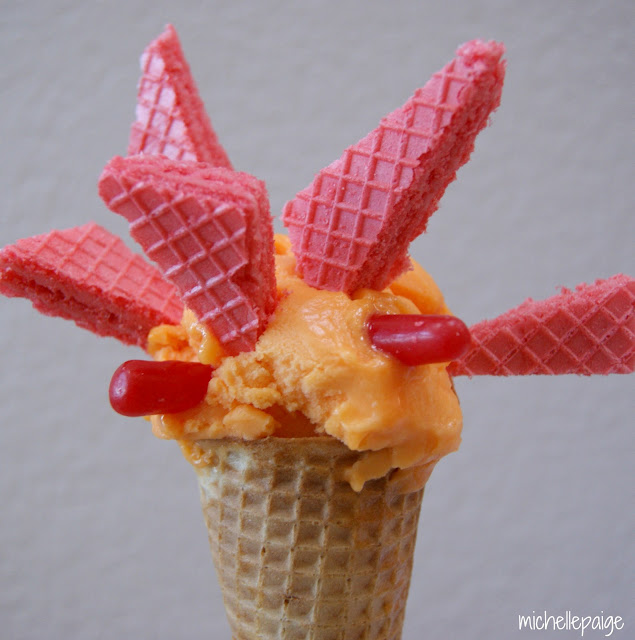
An Olympic Torch Sherbet Cone!


This treat is quick, cool and quite yummy...kind of like the Olympics, right?


Here's what we used.

Sugar cones filled with orange sherbet = cool.

Pink sugar wafer cookies cut into spiky wedges...you know, to look like flames!

Hot Tamales candies to give you that torch-like burn.


And there you have it!  Enjoy the games!


Did you see our Olympic Dinner?
Flag pizzas, grape catching, candy medals...


Click here to view post.


Linking up to: FrugalGirls, HappyHourProjects, Whipperberry,


 photo arrow.png CONTINUE READING

Monday

Today I'm sharing one my latest shopping adventures. 
It all started on a rainy day...
(I know, this doesn't surprise you.)
AH (Awesome Husband) asked if I wanted to go furniture shopping.
WHAT??  YES!!

Any time AH brings up the word 'shopping',
I jump up from whatever I'm doing and get in the car before he changes his mind!
AH consulted with his mom, (he's such a smart guy)
and drove me to this small, out of the way...
furniture store in Mt. Vernon, WA.
(about 1.5 hours north of Seattle).

I was quite doubtful we would find anything here. 
It looked so small and uninviting.
We were in desperate need of a coffee table.


One step in the door and I had to run back and grab my camera!
I had never seen a store like this!
The furniture was PACKED into this narrow building!


Tons of chairs were hanging on the walls and ceilings.


The furniture pieces were piled on top of each other! 
Couches, chairs, tables, lamps, desks, pillows, etc. all jammed together.

We had to physically move things around to see all the pieces.
What a treasure hunt!


Everywhere we looked, we saw so many interesting things.


Some new, some old, some unfinished...
some modern, some contemporary, some traditional.


Some pieces were locally made, some were custom made
and some pieces just had to come home with us!
We both fell for this unique coffee table trunk!


AH had to remove a bit of the surrounding furniture to even view this trunk, but what a find!

It was made in India using actual pieces of old Indian trunks.
I loved the wheels on it and the inside storage!

As we were paying for the trunk/table, I spotted this amazing 18 drawer cabinet unit.


 I loved the rustic quality to this piece. 
Old wood, dings and nails and the rusted label pulls, drew me in.
So of course it had to come home with us as well.

We found the perfect place for it...now I'm filling each and every drawer up with treasures.


What a shopping adventure!
I'm pretty sure that AH will not be taking me furniture shopping for quite awhile.


I learned a lesson, too.
Never judge a store by it's outside appearance!


Northwest Fine Furnishings
919 Riverside Drive
Mount Vernon, WA 98273
(360) 424-8455

Bought any furniture lately?

 photo arrow.png CONTINUE READING

Friday


I'm sure you've probably heard about or seen S'mores Cupcakes before...
but have you ever tasted them?  They're DIVINE!

Move over s'mores on a stick--with smoke in your eyes and chocolate that doesn't melt! 


If you ever want to impress a crowd, these S'mores Cupcakes will do it! 
Our friends were ooohh-ing and ahhh-ing over these treats.
They told me it was the best cupcake they had ever had! 
(If that's not the most ultimate compliment in the world, I don't know what is?!)

So here you have it...
S'mores Cupcakes!
Makes 24 cupcakes

First, make a graham cracker crust.

Crush up 1 1/2 cups of graham crackers.
Mix the crumbs with 4 Tbsp. of melted butter and 1/4 cup of sugar. 
Drop a Tbsp. of the mix into each cupcake liner and press down.
(Note:  You will be very tempted to eat spoonful after spoonful of this graham cracker mix. 
Try very hard to resist the temptation!  Do not get sidetracked!)
Bake the crusts for 5 min. at 350.

Next, whip up a chocolate cake mix and pour the batter over each crust, until liner is 2/3 full.
Bake 18 minutes until cupcakes are set.


Let the cupcakes cool a bit.
Now add some Hershey chocolate bar frosting!


Break apart 5-6 whole Hershey's bars into small pieces and place in a bowl.
Melt the chocolate in the microwave, 30 seconds at a time, stirring until melted.
Spread 1 Tbsp. of warm chocolate over each cupcake.
Place in the refrigerator to cool for 5-10 minutes. 


Time for the Marshmallow Frosting!
(If you thought the graham cracker crust was hard to resist, wait until you taste this frosting!)


Mix 1/2 cup of room temperature butter with 1 cup of Marshmallow Creme.
Mix until smooth and creamy.
Slowly add in 2 cups of powdered sugar, then add in 2 Tbsp. of milk.
Mix on medium until completely smooth.
Spread over each cupcake.

This frosting is to die for! Sweet, creamy, delicious.  It's my new favorite frosting.


Now let's add the fun garnish!  Toasted marshmallows!

Spread 2 cups of mini marshmallows on a baking sheet. Turn oven to broil setting.
Place baking sheet on top rack.
WATCH CAREFULLY FOR 10 SECONDS- then remove from oven.
 (I didn't watch very carefully, so mine were a bit gooey to work with!)

Place your toasted marshmallows on top of each cupcake.
Enjoy!

Lately, I've seen other S'mores Cupcakes with one single piece of a Hershey's chocolate bar
on top of the cupcake for added flair. 

{Source}
Some even add a drizzle of chocolate too!


One of our friend's son had a birthday while visiting us at the beach.
We added candles and wished him a Happy Birthday...and many 'smores'!


Here's the complete recipe.
S'mores Cupcakes
Ingredients:
1 1/2 cups crushed graham crackers
1/4 cup sugar
5 Tbsp butter, melted
1 box chocolate cake mix, prepared according to package.
5-6 full sized Hershey's Milk Chocolate Bars (1.55 oz each)
2 cups mini marshmallows, for garnish.
 
Directions:
  1. Preheat oven to 350°
  2. Line muffin tins with cupcake liners.  24 cupcakes
  3. In a medium bowl combine graham cracker crumbs, melted butter and sugar. Drop a Tbsp. of the graham cracker mixture into each liner and press down.
  4. Bake the crusts for 5 minutes and let cool.
  5. Prepare cake mix according to package and fill liners 2/3 full.
  6. Bake 15-20 minutes, until cupcakes are set.
  7. Break Hershey's bars into small pieces and melt in microwave, 30 seconds at a time, stirring after each time interval, until melted.
  8. Spoon 1 Tbsp. of chocolate on top of each cupcake.
  9. Chill cupcakes in fridge until chocolate is set.
  10. Frost with Marshmallow Frosting.
  11.  
Marshmallow Frosting Recipe
1 cup butter room temperature
2 cups Marshmallow Creme
4 cups powdered sugar
4 Tbsp milk
 
Directions
  1. Mix butter and Marshmallow Creme until smooth on medium speed.
  2. Slowly add in powdered sugar with mixer on low.
  3. Add in milk and turn speed up to medium and mix until all combined and smooth.
  4. Frost chocolate cupcakes with frosting.
  5.  
    Marshmallow Garnish
  1. To toast marshmallows, spread marshmallows on a baking sheet. Turn oven to broil.
  2. Place baking sheet on top rack. Toast marshmallows under broiler for 10 SECONDS. Watch very carefully!
  3. Remove from oven and garnish cupcakes.

    If desired, drizzle melted chocolate over cupcake and
    stick in one piece of Hershey's Chocolate Bar.

This recipe came from Cookies & Cups...a very, very yummy blog!


 photo arrow.png CONTINUE READING

Ever since this post, I've vowed to set up a 'photo booth' at each and every celebration.
The 4th of July is definitely a celebration.
So...a photo booth was a must!

Look how simple this was...
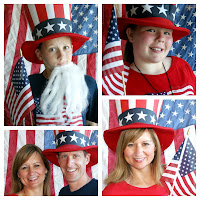
Dress: we all wore our Old Navy flag T-shirts.
For the backdrop: a big USA flag hung sideways on a blank wall.
For the props: Uncle Sam hat, fake white beard, small flag on a stick.


Here's my very patriotic family...

I especially love it when our guests eagerly participate!


 Hope you had a great 4th!  We sure did!


To see more of our photo booths...


Don't you think every party needs a photo booth?


Here's some more 4th of July ideas for you!


<


Linking up to: FoxHollowCottage, SerenityNow,

 photo arrow.png CONTINUE READING