twitter facebook instagram bloglovin google plus pinterest youtube

Wednesday


Yikes! It's the last day of November!  Time to get those advents finished!
Last week on my Facebook page I posted this fun 'gum' advent idea to give as gifts.


Totally inspired, I decided to make my own 'gum' advents
to give to my small group leaders that I coach at church. 

Instead of just counting down the days of Christmas by chewing a piece of gum,
I thought we could add in a specific prayer request to pray for each of the 24 days.
And, because I'm always in a hurry...I made mine quick and simple. 
No fancy paper folding or ruler measuring from this girl.

Here's how I made mine.


Purchase gum that comes in 12 piece 'tablet form' pockets.
I found Trident White in 3 packs on sale.
Tape two packages together to make a book.


Using a permanent marker, write the numbers 1-24 on each individual gum pocket.
Leave the gum out of the packages while you cover the boxes.


Get out your pretty Christmas 12 x12 scrapbook paper.
Cut paper into a 4 inch wide strip.
My gum pack was about 4 inches tall.  Measure your gum pack to be exact.
You should be able to cover 3 double packs with one piece of paper.


Use scrapbook adhesive, glue stick or double stick tape and
cover the actual gum box, one section at a time.


Start folding and pressing the scrapbook paper right onto the box.
(It's sort of like you're back in high school covering your books with paper sacks.)
(Remember that?  Do they still do that nowdays?)
Don't try to glue down the outside spine of your 'gum book'.
You'll want to be able to open it.

Other tricks:  As you press the paper onto the package,
bend the corners of the box in both directions.
(Make the edge of the package flat, then stand it up--back and forth)
By doing this, you'll make the paper fold into a neat edge.


When the entire 'gum book' is covered on the front and back,
trim off the excess and seal with a piece of tape.


Aren't they pretty?
Just so you know, mine did not open all the way up...
I made them a little tight--on purpose, right?
But they're still cute.


For my Small Group Leaders at church,
I added a list of kids/people we're praying for as well as specific requests.
Each time we 'pop' in a piece of gum, we'll say a prayer for that person or specific need.


And of course, I tied my 'Gum Advents' up with some Christmas ribbon!
 
Let the advent season begin!


Linking up to: HouseOfHepworths, EveryCreativeEndeavor, SassySites, Whipperberry, FrugalGirls,
 photo arrow.png CONTINUE READING

Monday

A few of my girlfriends wanted to take me out to a fancy night
on the town for my birthday.
All I really wanted was to spend the evening at the new Hobby Lobby located 45 minutes away. 
When I suggested we change our plans, my friends agreed!  Yay!

I know they thought I was crazy, but it was MY birthday, so they went with it. 
(Don't I have great friends?)
I emailed them a Hobby Lobby coupon, since I knew they could not resist this store!


We met up on a cold, stormy night and headed into Lynnwood, WA.
This Hobby Lobby is brand new--only 2 weeks old!  The first one near the Seattle area!
None of my friends had ever been in a Hobby Lobby...the first time is always special!


We were barely inside the door, and my girlfriends were already
 oohing and ahhing over the fabulous mirrors.
(They were pretty amazing!)


The last time I was in a Hobby Lobby (in Spokane) was in October with pumpkins everywhere.
This time the store was decorated in Christmas garlands and greens--beautiful!


I fell in love with these striped canvas crates.
I adore the silver handles!


Check out these fun black and white letters!


Look at these incredible jeweled tape dispensers and staplers.
(We girls all agreed that our sons would not steal our tape if it looked like this!)


Look at this clever idea. How fun would this be to recreate?


And take a look at this...
I so want to put ribbon on all my gift bags this year!


No trip to Hobby Lobby would be complete without touring the ribbon aisle!


 Both Leah and Jen found a few items they couldn't live without!


Heidi and I didn't go home empty handed, either!
(I can't seem to leave Hobby Lobby without some ribbon...not to mention a few other things.)


We ended the evening with a birthday dinner at a nearby Mexican restaurant!
Now, that is what I call a fun outing. 
Thanks friends!

Guess what I want to do for my birthday next year?


 photo arrow.png CONTINUE READING

Saturday

Look what I made---cake pops!
This new 'As Seen on TV' bake pop pan arrived last week.
Of course I had to try it out!
(Yes, I'll admit...I get a bit sucked in with those 'As Seen on TV' products.
Don't you always wonder if they really work?!)
The instruction guide said to add an extra egg,
substitute milk for water (use half as much) and
add a box of pudding to the cake mix.
(Apparently doing these things makes the cake denser--it did.)

After mixing everything up,  spray both pans with baking spray,
then pour the batter into the little compartments in the bottom pan.

Add the top pan and secure with the yellow clips.
Bake at 350 degrees for 25 minutes.

Uh-Oh!
It looks like I filled my containers a bit too full!
My kids thought this was soooo funny!
I 'quickly' used a knife and scraped off the extras...
while I listened to hysterical laughter and inappropriate comments.
(I'm sure you can imagine what they were saying!)

Comments stopped once they stuffed these 'extras' in their mouths!

Lift the top pan off---TaDah!
Because my compartments were so full, I ended up with a bit of an egg shaped cake pop.
(I need to remember this trick for Easter!)
I also ended up with this big ring around the middle of each cake pop.
(I scraped it off, but I wonder if less batter will make less of a ring?  Hmmm...)
Melt chocolate candy coating in the microwave.
Dip one end of the cake pop stick into the candy coating,
 then insert it into the cake pop.

Refrigerate for 10-15 minutes to harden.
Dip cake pop into the candy coating.
Then cover with lots of sprinkles!
(I might have over-did it a bit on the sprinkles?!)

I placed mine into mugs to dry.


Once hardened, place in little cupcake liners
and wrap up individually with a cellophane bag and ribbon.

Enjoy!
(Happy Birthday to my baby brother today.)


Linking up to: UnderTheTableandDreaming, EmbellishingLife, CraftOManiac, TheGunnySack, SkipToMyLou, TodaysCreativeBlog,
 photo arrow.png CONTINUE READING

Monday


One of the things I love about blogging, is seeing so many great ideas that others are doing. 
(and then, copying them!!)
One idea (I keep seeing) is to have a family thankful tree for Thanksgiving. 
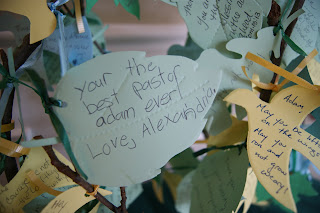
Family members write on paper leaves what they're thankful for
and then tie their leaves on branches to create a tree.. 

I've actually done this for others...


So, this year my family is making a Thankful Tree.

 
Remember this post from Halloween, when I tied ribbon around my pumpkins?


Well, it was time to refresh for Thanksgiving.


Here's the same pumpkins...although they're looking a little bit tired.
(Hang in there one more week, pumpkins!)
I read on another blog that I should bathe my pumpkins in clorox next year.
Apparently they keep 'forever' and don't rot?!

I tied them up with an orange'ish' color of ribbon
 and scattered a few fabric leaves.
(Fabric leaves are the best!  They're always beautiful!)


My bare red branches are just waiting for some thankful leaves!


I cut leaves out of colored card stock on my Cricut machine.
My family wrote what they were thankful for.
(I did have to encourage complete sentences, nice penmanship, etc. etc.
It seems they thought one word would do it?  I don't think so!)


The leaves were hole punched and tied onto the branches with burgundy colored ribbon.


And there you have it! 


Our Thankful Tree!

Other ideas I've seen:
-give one leaf to each family member every day in November to write a thanksgiving
-create tree on Thanksgiving Day, giving guests leaves at the dinner table
-take leaves off and put in a Thanksgiving scrapbook every year
-instead of using leaves, use tags already punched and ready to be tied
-children that can't write, draw pictures of what they're thankful for
-tree can be created on a wall, or leaves can hang from chandelier, instead of on branches

Happy Thanksgiving!
Give thanks to the Lord, for He is good; His love endures forever.
Psalm 107:1


Did you see what will be on our Thanksgiving table?
(They're made from a Dollar Store blanket!)
Here's what the kids gave their teachers.

Here's some cookies we'll be eating!
Click here to see source.
 photo arrow.png CONTINUE READING